clubmate.fi
A good[ish] website
Web development blog, loads of UI and JavaScript topics
Enhance WordPress page speed: load static assets from a cookie-less subdomain
Speed up page load time by parallelising image loading and setting up a cookieless subdomain or a whole new domain.
WordPress attaches a small cookie to every request it does, in a static assets, the cookies are not needed. This post deals with that.
I'm doing this on a DigitalOcean server, it's quire alright! Use this link to spin up a Droplet (server) and get $10 credit (that's my affiliate link).
Key pointers
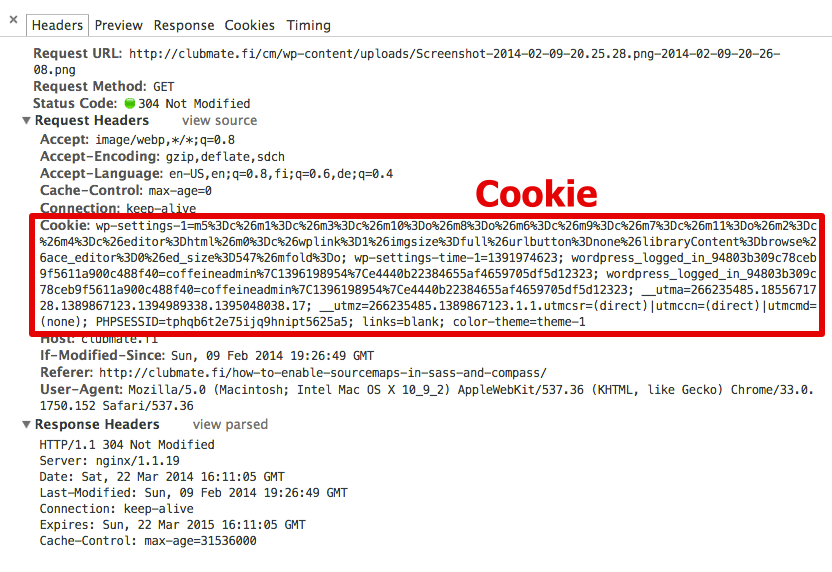
Cookies are data in the header of each HTTP request.
WordPress loves setting cookies for everything.
For static files, that cookie has no use, might as well strip it out.
Subdomains parallelize asset downloading.
If browser is capable of downloading 2 files simultaneously, serving files from two domains bumps that limit to 4.
To be honest, this stuff doesn't matter so much on normal low traffic sites, but is a well know best practise for high traffic sites. In the page speed business, generally no one thing is going to make site fast, it's the combination of many little things. Many small streams make a river in the end.
For example, Twitter loads it's images from pbs.twimg.com and Facebook from fbcdn-dragon-a.akamaihd.net.
Measurement tools
Google Page Speed and Yahoos ySlow are excellent tools to gauge site performance. They give you great pointers also.
Cookie policy explained
If your site is using WordPress, and uses example.com as the main domain, then all subdomains will have cookies, and there's nothing you can do about it. But, if your main site is in a subdomain, like www.example.com, then example.com can be cookie free. That's the first, and only, benefit of the www subdomain (that I've heard of). Personally, I don't care for the www subdomain so much. Luckily, static assets can be loaded from a completely different domain, that is cookie free.
Let's look at the process of setting up a subdomain first, and then the process of serving assets from a completely different domain.
Setting up a subdomain
I'm just going to use i.example.com, since I'm thinking it's mostly for images. This is only about NGINX, but if you're on Apache, the "server blocks" are called "virtual hosts", there's ample sources in the interwebs :)
NGINX server block
First, let's look at a normal, minimal server block, check the comments for more detailed description.
# Redirect www to non-www
server {
  server_name www.example.com;

  return 301 $scheme://example.com$request_uri;
}

server {
  # Server name, essentially the domain name
  server_name example.com;

  # Root directory
  root /var/www/example.com/public_html;

  # Logs
  error_log  /var/www/example.com/logs/example.com.error.log;
  access_log /var/www/example.com/logs/example.com.access.log;

  # Most of the configuration is common to all server blocks,
  # so it's in a common place (see more below)
  include global/common.conf;

  # Include WordPress specific config
  # of course comment out if it's not WP install
  include global/wordpress.conf;
}
Here's what my common.conf looks like.
The server block we want for our subdomain is tad different. We don't need the www redirection, also we don't need the WordPress, nor the logs (actually, you might want the logs, but let's just skip those now for the sake of simplicity). So it shrinks to something like this:
server {
  # Server name, essentially the subdomain
  server_name i.example.com;

  # Root directory
  root /var/www/example.com/public_html/path/to/images/;

  # Most of the configuration is common to all server blocks,
  # so it's in a common place (see it below)
  include global/common.conf;
}
Now let's put it in it's place, cd into into sites-available directory (that's where the server blocks live):
$ cd /etc/nginx/sites-availableYou can have the subdomain defined in the main domain's server block example.com, or make a new file for it. We're going to make new file called i.example.com:
$ sudo nano i.example.comNano opens up and you can paste in the server block from above. Save and exit (ctrl + x or ctrl + o). This will create the file.
Or you can copy an existing server block and use it as a template:
$ sudo cp example.com i.example.comNow we need to enable the server block, we do it by linking the file from sites-available to sites-enabled:
$ sudo ln -s /etc/nginx/sites-available/i.example.com /etc/nginx/sites-enabled/i.example.comRelative path are possible in that command also, see more on linking here
Then restart NGInx:
$ sudo service nginx restartNow the subdomain is up, but it's not working yet, because there's no DNS. Let's set that up next.
Subdomain DNS
DigitalOcean has a nice backend to control DNS.
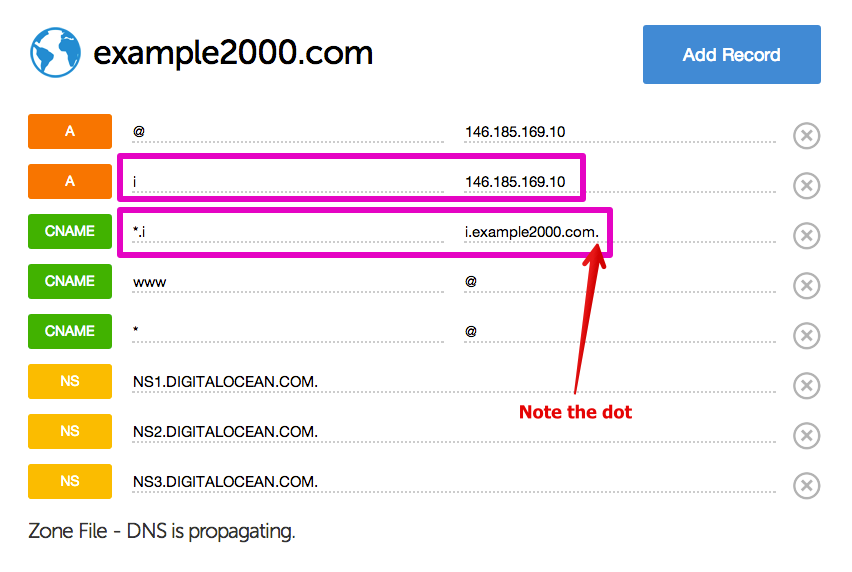
See that I've added the following records:
A        i      123.456.789.10   # Subdomain and your IP
CNAME    *.i    i.example.fi.    # Must end with a dot
Test the subdomain
I'm assuming you have ftp set up already. Place a test image into the images folder you pointed the subdomain to, and give it at least 644 file permissions:
$sudo chmod 644 /etc/www/example.com/public_html/path/to/file.jpgGive time for the DNS to change (5 to 10 minutes with DigitalOcean usually). Then navigate to the image http://i.example.com/path/to/images/file.jpg and see if it shows up.
Read more in detail about setting and testing subdomains here.
Make WordPress cookieless
Add this to your wp-config.php file:
define('COOKIE_DOMAIN', 'www.example.com');Now, only that domain has cookies.
Setting up a whole new domain for images
Get a domain somewhere, or maybe you've got a spare one gathering dust in the cupboard.
NGINX server block
We're gonna make a pretty standard server block and point it to our images directory.
server {
  # Server name
  server_name myimagedomain.com;

  # Root diretory
  # Note that it points to the images dir of your main domain
  root /var/www/myactualsite.com/public_html/path/to/images/;

  # Most of the configuration is common to all server blocks,
  # so it's in a common place. See more in the articel I
  # linked above
  include global/common.conf;
}
DNS for the new image domain
Make a new domain in the DigitalOcean backend.

Wait a bit and let the DNS propagate. Then test it like we did before.
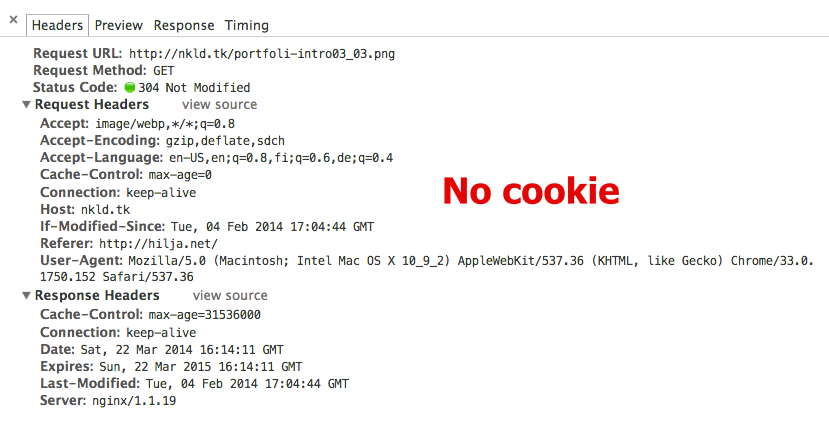
All images uploaded to that domain should be be cookie free right out the box, no need to set up anything in WP. You can view the headers in dev tools:
Conclusion
After setting it all up, test everything with YSlow and PageSpeed, and you should get a higher score :)
Comments would go here, but the commenting system isn’t ready yet, sorry.