clubmate.fi
A good[ish] website
Web development blog, loads of UI and JavaScript topics
Opening the matryoshka: pointless package management hell
This is a post about package managers, what are they and how to get started using them.

Totally not pointless, nor hell, I was just click bating you there, see.
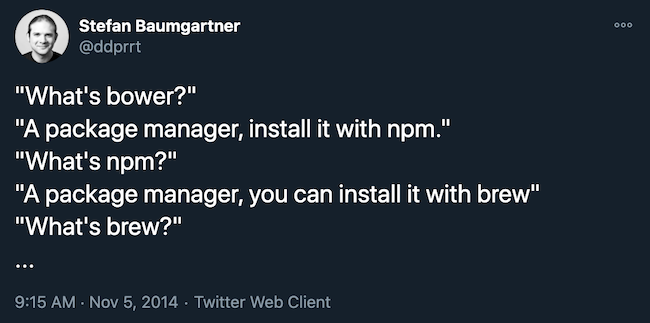
That tweet somehow touched me, I remembered when I was a neophyte in all dev matters, and in most install instructions I would say something like:
To install package just run:
$ bower install some-package
Then I’d search "How to install bower", and I’d get results like:
To install Bower run:
$ npm install bower
And the vicious package manager loop was set. This post tries to make the leap to command line package managers easier for beginners.
These instructions are quite specific to Mac, and to an extent to Ubuntu & Debian.
The package managers
There are different levels in package managers, Homebrew or apt-get are are for lower lever tools, then Bower sits higher in the chain, and NPM in between. All occupying their own niches.
With apt-get you can do OS updates, Homebrew is also capable of installing elementary software that is "bolted" deep into the OS. Homebrew is capable to install NPM, but not the other way around. And NPM can install Bower.
I'm going to group the package managers to three levels. Totally pulled that level system out of my ass just, it's not very scientific and there is overlap, hopefully this division helps to illustrate the differences.
A lot of ways it's like opening a Matryoshka doll.
- st level
- HomeBrew (for OS X)
- apt-get (for Ubuntu and Debian)
- nd level
- NPN (the node package manager)
- Ruby Gems (for ruby packages)
- rd level
- Bower (package manager for the web)
- Composer (for PHP)
By the way: there are more package managers than just these, these are the ones I know of and that are common to front end web development. For example, Pear does package installing, and pip is for Python packages.
HomeBrew
Homebrew complements OS X. Install your gems with
gem, and their dependencies withbrew.
Homebrew is "The missing package manager for OS X". In an ideal world Apple would've added it's own package manager to OS X, but as we all know, no such thing exists. App Store brushes this subject in a way.
Homebrew is written in ruby but not in any ways limited to Ruby packages.
Installing Homebrew
Pop your favorite Terminal app open, and paste in (check fresh installation instructions from brew.sh):
$ ruby -e "$(curl -fsSL https://raw.githubusercontent.com/Homebrew/install/master/install)"That should do the job.
Installing packages with Homebrew
Let's use NPM here as an example package, since we're talking about it later on this article (NPM == Node Package Manager, it comes with Node).
# Update the brew package list
$ brew update

# Install node
$ brew install node
Other useful commands:
$ brew reinstall <package>
$ brew search <package>
apt-get
apt-get is Ubuntu's and Debian's package manager, and comes baked into them.
Installing packages with apt-get
The package install syntax is familiar:
# Update the package list
$ apt-get update

# Install NGINX
$ apt-get install nginx
See more in the [documentations][https://help.ubuntu.com/community/aptget/howto].
npm
Node Package Manager. Along the advent of Browserify the npm isn’t only for Node modules anymore, but also for the front-end, including Sass and CSS packages.
Installing NPM
Use the official node installer or why not simply Homebrew:
$ brew install nodeInstalling packages with NPM
There's two main ways to install a package in NPM: locally and globally. Globally means to install a program so that it's available anywhere in the system, like a cli tool. Gulp or Grunt are model examples of packages you would install globally. Where as, a JavaScript module is installed locally into the project and is available only on that project.
So far, the syntax is pretty much the same for all of these package managers:
$ npm install <package>This makes a folder called npm_modules to the directory where the command was run, and pulls in the package to that dir. but it won't add it as dependency to a project. To do that let's use a --save-dev or --save flags:
# --save it as a project dependency
$ npm install <package> --save
# --save-dev it as a development dependency
$ npm install <package> --save-dev
But where does it save it? To package.json file. But it needs to be created first, just make it manually or use the init command:
$ npm init
This utility will walk you through creating a package.json file.
It only covers the most common items, and tries to guess sane defaults.

See `npm help json` for definitive documentation on these fields
and exactly what they do.

Use `npm install <pkg> --save` afterwards to install a package and
save it as a dependency in the package.json file.
It'll prompt you some questions. I just hit enter on all off them and the result is something like this:
{
  "name": "testi",
  "version": "1.0.0",
  "description": "",
  "main": "index.js",
  "dependencies": {},
  "devDependencies": {},
  "scripts": {
    "test": "echo \"Error: no test specified\" && exit 1"
  },
  "author": "",
  "license": "ISC"
}
Now the --save flag actually does something:
$ npm install gulp-sass --save-devAnd now gulp-sass is listed in devDependencies in the package.json file:
"devDependencies": {
  "gulp-sass": "^1.2.2"
},
What this means, is that now you can run npm install in project and it will pull in all the needed packages.
Dev dependency and dependency, know the difference.
- dependencies
- are a dependencies that are needed to run the site, like jQuery.
- devDependencies
- are something packages that are not needed in the front end, but during the development process, Gulp or Grunt are model examples of `deDependencies`.
RubyGems
RubyGems is mostly for Ruby packages. It has been around for long, and for what I understand, it was an inspiration for Bower and NPM.
Install RubyGems
It's built into Ruby v 1.9, you can test your Ruby version: $ ruby --version.
Ruby comes bundled in OS X, but it's recommended to run it with RVM (Ruby Version Manager), see the RVM docs how to install it.
Install packages with gem
Like in all the other package managers, packages can be searched:
# Search for package, can use regex patterns
$ gem search ^rails
# For more infor on the get use the -d (description) flag
$ gem search ^rails$ -d
And trivially installed:
# Install a package
$ gem install rails
A word about Bundler
Bundler is a helper tool for gems. From their website:
Bundler provides a consistent environment for Ruby projects by tracking and installing the exact gems and versions that are needed.
Bundler is an exit from dependency hell, and ensures that the gems you need are present in development, staging, and production. Starting work on a project is as simple as bundle install.
In NPM you can run npm install and it'll install all the dependencies listed in package.json. Gems don't have that, but Bundler makes that possible. You'll need a Gemfile where you specify your dependencies.
Another handy aspect of Bundler is, for example, when using WP-Stacks package to do WP deployments with Capistrano, WP-Stacks needs to use Capistrano 2.15.5 and not 3.x, then I would specify in my Gemfile:
$ gem 'capistrano', '2.15.5'And when I run the Capistrano's cap command, I would prefix it with bundle exec:
$ bundle exec cap deployNow Capistrano knows to use the version 2.15.5 and not the 3.x. I have both version installed, and by default, Capistrano would use the latest version.
Bower
A package manager for the web
Most often, Bower will install front end JavaScript and CSS packages.
You need to have Node, NPM, and Git installed.
Install Bower
Now that you got NPM installed, nothing stops us using it, install Bower globally:
$ npm install -g bowerInstall packages with bower
Again, syntax is identical, only the package manager name changes:
$ bower install <endpoint> [<endpoint> ..] [<options>]Install jQuery:
$ bower install jqueryIn simililar fashion with NPM Bower has a bower.json file where dependencies and dev dependencies are defined. You can make the file with the init command:
$ bower initIt'll prompt you a series of question, in very similar way as NPM does.
Now you can save packages as dependencies:
$ bower install jquery --saveAnd it's now listed in bower.json as a dependency:
"dependencies": {
  "jquery": "~2.1.0"
},
Composer
Dependency Manager for PHP
Install Composer
Install it globally:
$ curl -sS https://getcomposer.org/installer | php
$ mv composer.phar /usr/local/bin/composer
See more install options here.
Using Composer
Like in Bower and NPM a composer.json config file is where all the dependencies live:
{
  "require": {
    "monolog/monolog": "1.0.*"
  }
}
Then install the defined packages:
$ composer install
# See whats changed
$ ls
composer.json composer.lock vendor/
The vendor/ directory is where all the packages live, add it yo your .gitignore file, you don't want that in the repo.
The docs explain the composer.lock file well:
After installing the dependencies, Composer writes the list of the exact versions it installed into a composer.lock file. This locks the project to those specific versions.
Note: that you can't go like composer install <package> you have to use the composer.json file.
Composer packages live in the Packagist repository. If you do a search composer search that's where it's looking for the packages. There's also WordPress Packagist at wpackagist.org.
Basically anything can be installed with Composer, it doesn't have to be listed in the packagist (btw, same goes for Bower and NMP). For instance the composer.json file for installing WordPress would look something like this:
{
  "repositories": [
    {
      "type": "package",
      "package": {
        "name": "wordpress",
        "type": "webroot",
        "version": "4.0",
        "dist": {
          "type": "zip",
          "url": "https://github.com/WordPress/WordPress/archive/4.0.zip"
        },
        "require": {
          "fancyguy/webroot-installer": "1.0.0"
        }
      }
    }
  ],
  "require": {
    "wordpress": "4.*",
    "fancyguy/webroot-installer": "1.0.0"
  },
  "extra": {
    "webroot-dir": "public/wp",
    "webroot-package": "wordpress"
  }
}
Then run:
$ composer installThere is so much more to Composer than this! See the docs for more.
Comments would go here, but the commenting system isn’t ready yet, sorry.